


ADI Hazard Perception Test Practice Free Tips

Table of Contents
- What Is the ADI Part 1 Hazard Perception Test?
- Understanding the ADI Hazard Perception Scoring System
- Free ADI Hazard Perception Test Practice: Where to Start
- DVSA-Style Free Practice Resources for ADI Trainees
- How to Use Free Clips Effectively in Your Revision
- 1. Active Watching: Engage with the Clip
- 2. Repetition: Build Awareness and Speed
- 3. Self-Assessment: Review and Reflect
- 4. Time Management: Simulate Real Test Conditions
- 5. Final Review: Test Yourself Regularly
- Expert Tips to Maximise Your ADI Hazard Perception Score
- 1. Focus on the First Signs of Hazard Development
- 2. Prioritize Timing Over Speed
- 3. Practice on a Variety of Scenarios
- 4. Slow Down to Speed Up
- 5. Master the Scoring Window
- 6. Simulate Real Test Conditions
- 7. Use Video Replay for Self-Analysis
- 8. Be Consistent with Your Practice
- 9. Mindset: Focus on Calmness and Confidence
- Spotting Developing Hazards Early: The Key to a High Score
- Avoiding the Pattern-Clicking Penalty
- Common Mistakes ADI Trainees Make in Hazard Perception Practice
- Take Your ADI Part 1 Revision to the Next Level
- FAQs
What Is the ADI Part 1 Hazard Perception Test?
ADI Hazard Perception Test Practice Free Tips The ADI (Approved Driving Instructor) Part 1 hazard perception test is a crucial component of the full theory test, designed to assess an instructor’s ability to spot potential hazards on the road. In this test, candidates watch a series of video clips featuring everyday driving situations where hazards develop. They must respond by clicking the mouse as soon as they spot a developing hazard. The test is designed to evaluate the candidate’s observation skills and ability to react appropriately to hazards that may arise while driving. This portion of the theory test plays a key role in ensuring that ADI candidates possess the necessary awareness and foresight to teach safe driving techniques to learners, making it an essential step in the qualification process.
How the ADI Hazard Perception Test Differs from the Standard Learner Test
What Types of Hazards Appear in ADI Hazard Perception Clips?
In the ADI hazard perception test, developing hazards are categorized into several types, reflecting the diverse driving situations an instructor must be able to assess. Road-based hazards include changes in road conditions or layout, such as sharp bends, junctions, or roadworks, where drivers may need to adjust their speed or position. Pedestrian-related hazards involve situations where pedestrians are crossing or approaching the road, such as someone stepping off the pavement unexpectedly or crossing at an unmarked location. Vehicle-based hazards typically feature other road users, such as another vehicle pulling out in front of the candidate, cyclists moving into their path, or motorcyclists who may need to adjust their speed or position quickly. These categories test the candidate’s ability to predict and react to hazards from different sources, ensuring that an ADI can teach learners to respond safely in a wide range of scenarios.
Understanding the ADI Hazard Perception Scoring System
In the ADI hazard perception test, candidates are awarded points based on how quickly they identify a developing hazard in each video clip. Each clip contains one or more potential hazards, and the goal is to respond as soon as the hazard starts to develop. The earlier the response, the more points are awarded, with a maximum of 5 points available for the most timely response. As the hazard develops, the points gradually decrease, and after a certain point, no further points can be earned for that hazard. This system is designed to test not only the candidate’s ability to spot hazards but also their ability to do so with enough time to react appropriately while driving. The total score for the test is out of 75, with candidates needing to score at least 57 to pass. Responses are evaluated based on the speed and accuracy of the clicks, ensuring that candidates are truly spotting hazards as they emerge rather than reacting to obvious, fully developed situations.
What Score Do You Need to Pass the ADI Part 1 Hazard Perception Test?
The minimum pass mark for the ADI hazard perception section is 57 out of 75. This is a crucial part of the overall ADI Part 1 theory test, which also includes a multiple-choice section. To pass the entire Part 1 test, candidates must achieve at least 43 out of 50 on the multiple-choice questions and 57 out of 75 on the hazard perception test. Together, these components assess a candidate’s theoretical knowledge and practical hazard awareness, ensuring they possess the skills needed to safely instruct learner drivers. The higher pass mark for the hazard perception section reflects the advanced level of observation and anticipation required from a qualified driving instructor compared to a learner driver, underscoring the responsibility an ADI holds in promoting road safety.
How the Click-Timing Window Works in DVSA Hazard Perception Clips

Free ADI Hazard Perception Test Practice: Where to Start
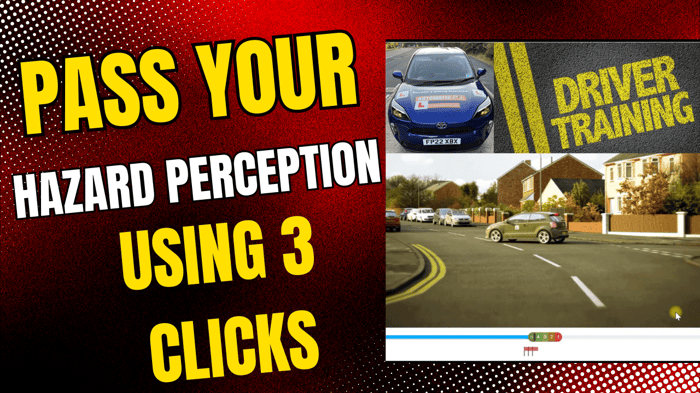
For those looking to begin their ADI hazard perception practice, a great starting point is www.theoryhelp.co.uk from Driver Training Ltd. This website offers a range of DVSA-aligned practice tools specifically designed for aspiring driving instructors. The site features realistic, high-quality hazard perception clips that mirror the format and difficulty level of the actual test, helping candidates familiarize themselves with the scoring system and the types of hazards they’ll encounter. By using these free resources, candidates can practice spotting developing hazards in various driving scenarios, ensuring they are well-prepared for the ADI Part 1 test. Alongside this, there are other online platforms and apps offering similar DVSA-aligned practice material, but TheoryHelp’s tailored focus on ADI preparation makes it an excellent choice for those serious about passing the hazard perception section.
DVSA-Style Free Practice Resources for ADI Trainees
For ADI trainees preparing for the hazard perception test, there are several free DVSA-style resources available online. Here’s a list of some of the most popular options, along with an evaluation of how well they replicate the real test experience:
- TheoryHelp.co.uk (Driver Training Ltd)
Evaluation: This site is one of the most recommended for DVSA-aligned practice. It offers free hazard perception clips that closely mirror the format and difficulty of the real ADI test. The scoring system is also aligned with the DVSA’s, giving users a realistic practice experience. This resource is particularly useful for candidates looking to simulate the actual test environment.
Best for: A DVSA-authenticated experience with a focus on ADI-specific preparation.
How to Use Free Clips Effectively in Your Revision
To effectively use free hazard perception clips in your revision, it’s important to adopt a structured approach that maximizes learning and improves your ability to identify developing hazards quickly and accurately. Here’s a step-by-step guide:
1. Active Watching: Engage with the Clip
- Watch without Clicking First: Begin by watching each hazard perception clip without clicking. Focus on the overall scene and take note of the road layout, weather conditions, and the presence of other road users (vehicles, pedestrians, cyclists, etc.). This will help you better understand the context before you start identifying specific hazards.
- Identify Key Hazard Indicators: As you re-watch, try to identify the subtle indicators that suggest a hazard is about to develop. These might include a pedestrian approaching the road, another vehicle changing lanes, or a sharp bend ahead. Pay attention to these signals while you practice.
2. Repetition: Build Awareness and Speed
- Re-watch the Clips: Repetition is essential for honing your skills. Watch each clip multiple times, ensuring that you’re not just recognizing the hazard but also reacting to it in a timely manner. The more you repeat this process, the quicker you’ll get at spotting hazards.
- Increase the Challenge: As you grow more comfortable, try to watch the clips more quickly or in a different order. This helps you adapt to varying driving scenarios and improves your ability to react fast, just like you will need to in the real test.
3. Self-Assessment: Review and Reflect
- Evaluate Your Responses: After each clip, review your performance. Many free resources, such as TheoryHelp.co.uk, provide feedback on when you clicked and how many points you earned. Use this feedback to gauge whether you clicked too early or too late.
- Focus on Mistakes: If you scored low on any clips, pause and reflect on why. Were you too slow to react? Did you click too early without enough information? Understanding your mistakes will help you improve faster.
- Track Progress: Keep track of your scores over time. Look for patterns in your performance—are you consistently improving, or do certain types of hazards (e.g., pedestrian-related or vehicle-based hazards) need more focus? Adjust your practice accordingly.
4. Time Management: Simulate Real Test Conditions
- Practice under Test Conditions: Once you feel confident, simulate the actual test environment. Set a timer and attempt to complete all clips without pausing. This will help you build the mental endurance required to stay focused throughout the full hazard perception test.
- Gradually Build Test-Specific Skills: Start by focusing on the fundamentals (identifying hazards), then refine your timing and scoring strategy. Work towards mastering the fine balance of reacting early enough to score the maximum points but not so early that you’re guessing.
5. Final Review: Test Yourself Regularly
- Retake Difficult Clips: Some clips might be more challenging than others, especially those that feature subtle or gradual hazard developments. Retake these clips regularly until you feel confident spotting the hazard at the earliest stage.
- Seek Feedback: If available, discuss difficult clips with others (e.g., fellow trainees or instructors) to gain new insights on how to spot certain hazards more effectively.
By following this structured approach—active watching, repetition, self-assessment, and simulating test conditions—you’ll be able to maximize your preparation for the ADI hazard perception test, improving both your awareness and response times.
Expert Tips to Maximise Your ADI Hazard Perception Score
To consistently achieve high scores in hazard perception practice and the real test, ADI trainees can apply a combination of strategic techniques and mindset shifts. Here are expert strategies to help you hone your skills and boost your performance:
1. Focus on the First Signs of Hazard Development
- Early Recognition: The key to earning top points in hazard perception is spotting the hazard as early as possible. Watch for early indicators such as changes in road position of other vehicles, pedestrians looking like they might step onto the road, or vehicles slowing down. Recognizing these subtle cues means you can react more quickly, earning maximum points.
- Anticipate the Hazard: Practice predicting what will happen next based on the road layout, traffic, and weather conditions. Being able to anticipate a developing hazard gives you a head start in clicking at the right moment.
2. Prioritize Timing Over Speed
- Don’t Rush the Click: While it’s important to react quickly, don’t click too early without enough information. Clicking too soon will result in zero points. Instead, wait until there is a clear sign of a developing hazard (e.g., a vehicle indicating a lane change or a pedestrian moving toward the road) but try to act swiftly before the hazard fully materializes.
- Gradual Anticipation: Some hazards develop slowly (like a cyclist weaving in and out of traffic). In these situations, be patient and wait for a clear indication, but still aim to react earlier than you might instinctively do during real driving.
3. Practice on a Variety of Scenarios
- Vary Your Practice: Use a mix of free DVSA-style clips that cover various driving environments, such as urban roads, rural roads, and motorways. Practicing in different contexts helps you adapt to spotting different types of hazards—pedestrian, vehicle, or road-based—at all speeds.
- Focus on Subtle Hazards: Some hazards are much subtler than others (e.g., a car approaching a junction from a side street, or a pedestrian starting to cross from behind parked cars). Deliberately practice clips with these more subtle cues so you get better at noticing hazards that aren't as immediately obvious.
4. Slow Down to Speed Up
- Consciously Slow Your Reactions: It may sound counterintuitive, but by intentionally slowing down your clicking during practice, you can focus more on why you’re clicking and ensure you're responding to genuine hazard cues rather than reacting to every small movement. This way, you can increase your accuracy and improve your scoring.
- Speed Up with Confidence: Once you feel confident in your ability to spot and assess hazards, increase the speed of your responses during practice. The goal is to strike a balance between quick reactions and accurate hazard identification, without jumping the gun.
5. Master the Scoring Window
- Understand the Scoring Mechanism: To maximize your points, learn to time your clicks to hit the “sweet spot” in the scoring window. Clicking too early can result in zero points, while clicking too late results in lower scores. Aim to click when the hazard is developing enough for you to be certain it will require a reaction, but before it becomes too obvious.
- Test Yourself with Realistic Clips: When using practice clips, simulate the real test conditions where you need to react to a series of clips in quick succession. This helps you develop mental endurance, sharpens your ability to spot hazards faster, and trains you to maintain focus throughout the entire test.
6. Simulate Real Test Conditions
- Practice under Time Pressure: The real hazard perception test involves a series of clips played in a fixed time frame. To prepare, practice in timed sessions where you watch and react to clips without stopping or going back. This will help you build the stamina needed for the test.
- Retake Clips to Track Improvement: After each practice session, review your performance and track any clips where you struggled. Retake those clips regularly to sharpen your response times and ensure you're consistently improving. Over time, you’ll learn to spot hazards more quickly and with greater precision.
7. Use Video Replay for Self-Analysis
- Review Your Clicks: After each practice session, take time to watch the video clips again and analyze your clicks. Did you click too early? Did you miss a developing hazard entirely? Understanding where and why you made mistakes helps you adjust your reaction times for future practice.
- Learn from Your Mistakes: If you didn’t score highly on a specific hazard, ask yourself what could have alerted you earlier. Was it the movement of a vehicle? Was there a change in road layout that you missed? Practicing this reflective approach will help you avoid making the same mistake twice.
8. Be Consistent with Your Practice
- Daily Practice: Consistency is key. Aim for short, focused practice sessions rather than long, overwhelming ones. Even 15-20 minutes of hazard perception practice a day can have a significant impact on your score over time.
- Gradual Progression: Start with the basic clips and gradually increase the difficulty. As you get more comfortable with simple hazards, challenge yourself with clips that feature more complex or subtle hazards.
9. Mindset: Focus on Calmness and Confidence
- Stay Calm and Focused: During the real test, maintaining a calm and focused mindset is crucial. Stress and pressure can lead to rushed or incorrect clicks. During practice, replicate test conditions and practice staying composed.
- Trust Your Training: Trust that with consistent practice, your reaction times and hazard awareness will improve. The more you practice, the more confident you’ll become, reducing the chances of second-guessing or hesitation in the real test.
By applying these expert strategies, ADI trainees can improve their hazard perception skills, achieve consistently high scores in practice, and be well-prepared to tackle the real test with confidence and precision.
Spotting Developing Hazards Early: The Key to a High Score
Avoiding the Pattern-Clicking Penalty
Common Mistakes ADI Trainees Make in Hazard Perception Practice
During hazard perception practice, many ADI trainees make a few common errors that can impact their test performance. Addressing these mistakes before the real test is essential for achieving a high score. Here are the most frequent errors and tips on how to correct them:
1. Clicking Too Early
- Error: Some trainees click before the hazard has actually started to develop, thinking they’ll score points faster. However, this results in zero points, as the DVSA system only rewards clicks when a genuine hazard is emerging.
- How to Correct: Wait for clear signs that the hazard is truly developing. For example, wait until you see a vehicle moving into your path or a pedestrian stepping onto the road. Focus on reacting to real cues, not just guessing.
2. Clicking Too Late
- Error: Clicking too late, after the hazard has fully developed, results in lower points or no points at all. This is common when candidates wait too long to react.
- How to Correct: Train yourself to identify developing hazards earlier, using key signs like changes in vehicle behavior or pedestrians looking like they may step onto the road. Practice with clips that feature subtle or gradual hazards to sharpen your timing.
3. Rhythmic or Rapid Clicking
- Error: In an attempt to increase their score, some trainees rapidly click in a rhythmic pattern, hoping to catch every possible hazard. This behavior is detected by the DVSA’s system, which invalidates any points for repetitive clicking.
- How to Correct: Only click when you see a genuine developing hazard. Focus on deliberate, hazard-triggered clicks. Don’t rush or click without reason—let the hazard trigger your response naturally.
4. Failing to Recognize Subtle Hazards
- Error: Many trainees miss more subtle or gradual hazards, such as a car preparing to turn, a cyclist weaving between lanes, or pedestrians about to cross in an unmarked area.
- How to Correct: Practice identifying subtle hazards that develop slowly. Focus on the behavior of other road users, looking for signs like vehicles slowing down, cyclists shifting lanes, or pedestrians inching toward the road. Train your eye to spot these less obvious cues.
5. Focusing Too Much on One Area
- Error: Trainees may fixate on a single part of the road, such as a car directly in front of them or a pedestrian at a crossing, missing other potential hazards in the periphery.
- How to Correct: Maintain a wide field of vision and constantly scan the entire road. Look ahead, but also monitor the edges of the road and the movement of vehicles around you. This broader awareness helps you identify potential hazards from various directions.
6. Lack of Consistency in Practice
- Error: Inconsistent practice, such as cramming or practicing too infrequently, can lead to slower reaction times and a lack of familiarity with the test format.
- How to Correct: Establish a consistent practice routine, ideally daily, with short, focused sessions. This ensures you're regularly exposed to different types of hazards and can build the muscle memory needed for quick, accurate responses. Track your progress and focus on areas where you're consistently scoring lower.
7. Not Adjusting for Different Driving Environments
- Error: Some trainees fail to adapt to different types of hazard perception scenarios, such as urban roads with pedestrians, rural roads with unpredictable hazards, or motorways with high-speed vehicles.
- How to Correct: Practice a variety of scenarios, including urban, rural, and motorway clips. Each environment has different types of hazards that require different levels of awareness. Familiarize yourself with all types of situations to ensure you're prepared for anything in the real test.
By addressing these common errors—clicking too early or too late, failing to recognize subtle hazards, rhythmic clicking, and poor focus—ADI trainees can sharpen their hazard perception skills and improve their chances of scoring well on the real test. Consistent, deliberate practice that focuses on genuine hazard recognition is key to mastering the test and becoming a more effective driving instructor.
Take Your ADI Part 1 Revision to the Next Level
FAQs
What is the ADI Part 1 test, and what does it involve?
The ADI Part 1 test is the first part of the qualification process for becoming an Approved Driving Instructor (ADI). It consists of two sections: a multiple-choice theory test (covering road safety, teaching techniques, and legal regulations) and a hazard perception test, which evaluates your ability to identify potential hazards on the road. Both sections must be passed in order to progress to the next stages of the ADI qualification.
How can I prepare for the ADI hazard perception test?
The best way to prepare for the ADI hazard perception test is by practicing with DVSA-aligned hazard perception clips. You can use free resources such as www.TheoryHelp.co.uk from Driver Training Ltd, which offers practice clips designed to replicate the actual test. Focus on spotting developing hazards early, avoid rapid or rhythmic clicking, and regularly practice to improve your reaction time. Combining this with a comprehensive study of driving theory and road safety will enhance your overall preparation.
How do I know if I’m clicking too early or too late during hazard perception practice?
In the hazard perception test, clicking too early (before the hazard has started to develop) results in zero points, while clicking too late (after the hazard is fully developed) will earn fewer points. The ideal response is to click as soon as you notice the hazard beginning to emerge, but not before. Many practice platforms, like Driver Training Ltd, offer feedback on your timing, helping you evaluate your responses and correct any mistakes.
Can I use free resources to fully prepare for the ADI Part 1 test?
While free resources like hazard perception clips and basic theory practice are useful, they may not be enough to fully prepare for the ADI Part 1 test. To ensure comprehensive preparation, it’s recommended to combine free practice with Driver Training Ltd's full ADI Part 1 course, which includes 1500+ DVSA-style questions, detailed study materials, and expert guidance. This complete package will help you prepare for both the theory and hazard perception sections, simulating the actual test environment.
What’s the passing score for the ADI hazard perception test, and how is it scored?
To pass the ADI hazard perception test, you must score at least 57 out of 75. The scoring is based on how early you spot a developing hazard. The earlier you click when you identify a hazard, the more points you earn (with a maximum of 5 points per hazard). The system detects clicks that occur too early or too late, and only valid responses to genuine developing hazards are counted. Consistent practice and improving your reaction timing will help you achieve a high score.